Hello World Android Studio
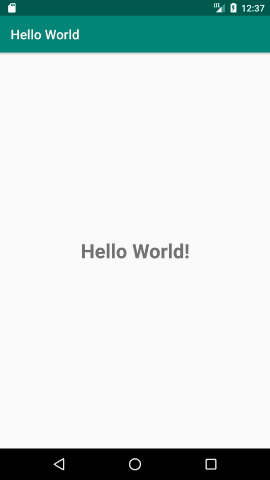
In this tutorial we will see how to create Hello World application in android using Android Studio. Here we will use TextView widget and print Hello World message.
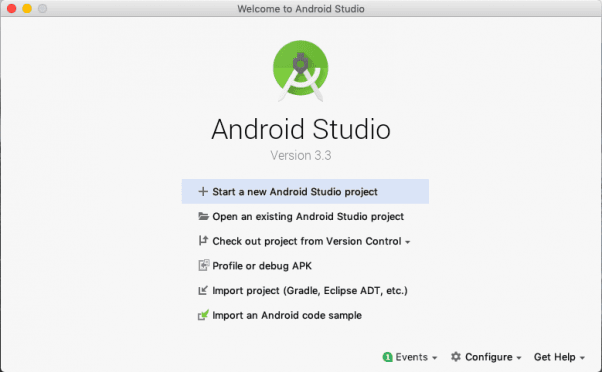
To begin with Hello World application start Android Studio and you will see message Welcome to Android Studio message. We will create new application so we will select “Start a new Android Studio project”.
Follow the steps to create Hello World program
Step 1

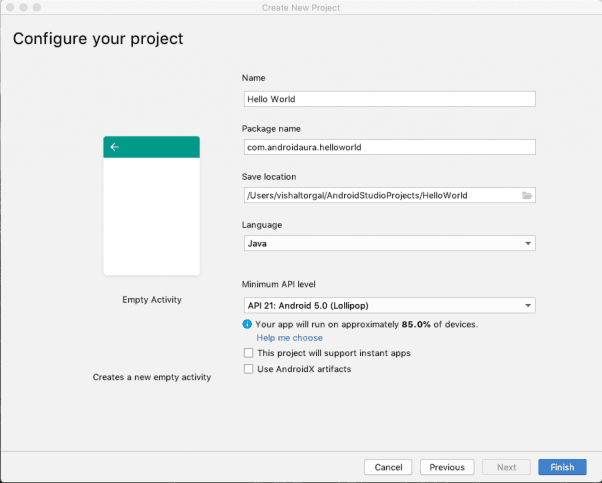
Now you can see many small activities. To begin with we will select Empty Activity and press Next. This will create new blank Activity.
Step 2


Now enter you name in Name box. Example – Hello World
- In Package name put you package name. Example – com.techstackguru.helloworld
- Next select location where this project should be saved.
- In Language specify in which language you will be programming. Example we will select “Java” here.
- Select minimum API Level to begin with. Example we have selected API 21: Android 5.0 (Lollipop)
Click on Finish button once done.
Step 3

Once you created an application two files will be generated.
- MainActivity.class
- activity_main.xml
MainActivity.java is a class file in which you will write java program.
MainActivity.java
package com.techstackguru.helloworld;

import android.support.v7.app.AppCompatActivity;
import android.os.Bundle;

public class MainActivity extends AppCompatActivity {

    @Override
    protected void onCreate(Bundle savedInstanceState) {
        super.onCreate(savedInstanceState);
        setContentView(R.layout.activity_main);
    }
}
This is activity_main.xml file, here we will write code rated to xml. Below we are using TextView widget and will display Hello World! message.
activity_main.xml
<?xml version="1.0" encoding="utf-8"?>
<android.support.constraint.ConstraintLayout xmlns:android="http://schemas.android.com/apk/res/android"
    xmlns:app="http://schemas.android.com/apk/res-auto"
    xmlns:tools="http://schemas.android.com/tools"
    android:layout_width="match_parent"
    android:layout_height="match_parent"
    tools:context=".MainActivity">

    <TextView
        android:layout_width="wrap_content"
        android:layout_height="wrap_content"
        android:p="Hello World!"
        android:textSize="30sp"
        android:textStyle="bold"
        app:layout_constraintBottom_toBottomOf="parent"
        app:layout_constraintLeft_toLeftOf="parent"
        app:layout_constraintRight_toRightOf="parent"
        app:layout_constraintTop_toTopOf="parent" />

</android.support.constraint.ConstraintLayout>
Step 4
Run an application with Run button as displayed in an image


Step 5
Select an Available Virtual Devices