WebView in Android
In Android development, the WebView allows an app developer to integrate a web page as a part of his application. The integrated web page can either be loaded from the Android application or the URL of the web page. In simpler words, Web View is used to display online content in an Android app activity, or you can say that it turns an Android app into a web app.
Not only that, a WebView also provides many additional features that a desktop browser has, such as cookies, history management, HTML5 support and many more. Also, by using Web View, we can specify an HTML string in order to show it in one of our application activities.
To display a web page in an app, the WebView tool in Android has to use the Webkit engine. In the android.webkit package, Web View is a subclass of the Absolute Layout class in Android. The Absolute Layout class is a subclass of ViewGroup, which is a subclass of View. With this chain of classes, the Android Web View component becomes a complete browser embedded into an application.
WebView in Android Steps
If you wish to implement Web View in your Android application, you will need to use the Android Studio IDE (Integrated Development Environment). Therefore, you may start by opening the Android Studio IDE.
Then, you need to “create a new project” on the Android Studio IDE. For this step, our earliest tutorials would be helpful for you. As you are creating a project, you will be asked to enter a project name and package name for your project.
We have set “webview” as our project name and “com.techstackguru.webview” as our package name.
After creating a project, open your MainActivity.java class file so you can enter the following java code:
MainActivity.java
package com.techstackguru.webview;

import androidx.appcompat.app.AppCompatActivity;

import android.os.Bundle;
import android.webkit.WebSettings;
import android.webkit.WebView;

public class MainActivity extends AppCompatActivity {

    WebView wv;

    @Override
    protected void onCreate(Bundle savedInstanceState) {
        super.onCreate(savedInstanceState);
        setContentView(R.layout.activity_main);

        wv = (WebView)findViewById(R.id.webview);
        WebSettings webSettings = wv.getSettings();
        webSettings.setJavaScriptEnabled(true);

        wv.loadUrl("https://www.techstackguru.com");
    }
}
With this code, the basic template of our project has been developed. As you can see in the code, we have used the loadUrl() method of the Android Web View class in order to load the web page. The web page we have loaded is “https://www.techstackguru.com.” Apart from simply loading the URL, we can have more control over our Web View by using different methods.
Now, you must open the activity_main.xml file in order to add the following code:
activity_main.xml
<?xml version="1.0" encoding="utf-8"?>
<LinearLayout
    xmlns:android="http://schemas.android.com/apk/res/android"
    xmlns:tools="http://schemas.android.com/tools"
    android:layout_width="match_parent"
    android:layout_height="match_parent"
    tools:context=".MainActivity">

    <WebView
        android:id="@+id/webview"
        android:layout_width="match_parent"
        android:layout_height="match_parent" />

</LinearLayout>
In the next step, you have to open your AndroidManifest.xml file and add the code mentioned below:
androidManifest.xml
<uses-permission android:name="android.permission.INTERNET" />The Android Manifest code is important. If you wish for one of your Activities to access the internet and load web pages, you need internet permissions. These permissions are added in the Android Manifest file.
The part in our Manifest file defines internet permission to access it in our project.
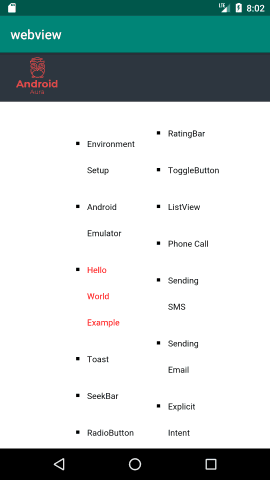
Once you have entered all your codes in the right files, your project will be ready to run. So launch your project in this step and you will get an output that looks like this: